Building a NaCl App
Deprecation of the technologies described here has been announced for platforms other than ChromeOS.
Please visit our migration guide for details.
In the browser!
Follow along with Brad Nelson’s Google I/O 2014 talk. Explore our new in-browser development environment and debugger.
Learn how easy it is to edit, build, and debug NaCl application all in your desktop web browser or on a Chromebook. Work either on-line or off-line!
Our Web-based Tools
These development tools are a work in progress. At this point, they are a learning tool and demonstration of NaCl’s flexibility, but are not the recommended tools for a production application. In the future, that may change, but for the moment, to develop a substantial application for Native Client / Portable Native Client, we recommend you use the Native Client SDK.
NOTE: The NaCl Development Environment is not yet stable. Ideally, user data is preserved, but currently it can be lost during updates or sporadically. We're working to resolve this.Installation
The setup process currently requires several steps. We’re working to reduce the number of steps in future releases. As the process gets easier, we’ll update this page.
To install the development environment:
- Install the NaCl Development Environment.
Navigate to: chrome://flags and:
- Enable Native Client.
- Restart your browser by clicking Relaunch Now.
- First run is slow (as it downloads and installs packages). Launch and allow initial install to complete before first use.
Editing
To follow along in this codelab, you’ll need to use a text editor to modify various files in our development environment. There are currently two editor options, nano or vim. We have an Emacs port, but it is not yet available in the Dev Environment (coming soon). If you’re unsure what to pick, nano is simpler to start with and has on-screen help.
You can open nano like this:
$ nano <filename>
Here’s an online nano tutorial.
You can open vim like this:
$ vim <filename>
Here’s an online vim tutorial.
Git Setup
This tutorial also uses a revision control program called git. In order to commit to a git repository, you need to set up your identity.
Run these commands (with your info) to setup your ~/.gitconfig for use:
git config --global user.name "John Doe"
git config --global user.email johndoe@example.com
Tour (follow the video)
Create a working directory and go into it:
$ mkdir work
$ cd work
Download a zip file containing our sample:
$ curl https://nacltools.storage.googleapis.com/io2014/voronoi.zip -O
$ ls -l
Unzip the sample:
$ unzip voronoi.zip
Go into the sample and take a look at the files inside:
$ cd voronoi
$ ls
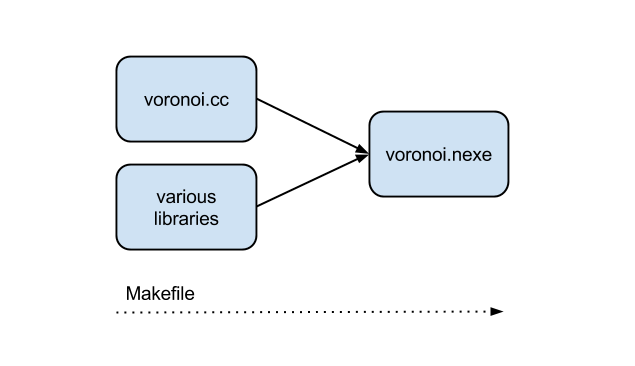
Our project combines voronoi.cc with several C++ libraries to produce a NEXE (or Native Client Executable).
Let’s use git (a revision control program) to track our changes.
First, create a new repository:
$ git init
Add everything here:
$ git add .
Then commit our starting state:
$ git commit -m "imported voronoi demo"
Now, run make voronoi to compile and run our program (NOTE: Changed since video, we’ve got Makefiles!):
$ make voronoi
Thanks
Thanks for checking out our environment. Things are rapidly changing and in the coming months you can expect to see further improvements and filling out of our platform and library support.
Follow the status of the NaCl Dev Environment at this page.